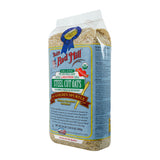
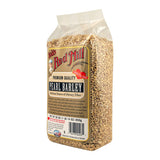
What's In Parker's Pouch? Homemade Cereal Edition

There are two things I feel like almost all moms have in common: 1) they want the best for their kids, and 2) they have very little time. I fall firmly in that camp with my work at LGP (Melissa here – one of the co-founders), the interior design firm I run and, most importantly, my amazing little girls Bailey (2) and Parker (7 months). Also, my addiction to Pinterest doesn’t help.

So a month ago, when Parker turned 6 months and was ready for real food, I found myself wondering how I was going to find the time to make all of her baby food like I had done with Bailey (isn't it amazing how much easier things are when there is just one baby?). I realized I’d forgotten all of the rules, which foods were best to introduce when and the easiest way to make everything. And it occurred to me that I'm probably not alone. So in an attempt to make all of your lives a little easier, I've decided to start a regular post called “What’s in Parker’s Pouch” where I plan to share what I’m doing to make sure Parker is getting the best, real food, I can make.


Our current pouches hold 7 oz., which is a great size but a little more than a new eater needs in one sitting. So, the very first thing I stored in Parker's Pouches was my homemade rice, oatmeal and barley cereal. I 'm including each of the 3 recipes (super easy as long as you have a strong blender or food processor) below. I never made Bailey’s rice cereal, mostly because I didn’t know I could. But after I started following 100 days of real food and the food babe (bad name, great blog), I decided I'd try to make absolutely everything for my girls. So far, so good :).

Anyhow - here are my tips for these cereals:
1. GRIND GRIND GRIND: Grind them longer than you think, especially for new eaters. Any time Parker got a chunk of anything she spit it out. They're so used to having a liquid diet that “chunks” don’t go over well at first.

2. USE BREAST MILK AS YOUR LIQUID: Adding breast milk (or formula) instead of water was a huge success after a few failed tries with just water. Parker wanted something familiar! Plus, it made the mealtime that much healthier.
3. DON’T TRY INTRODUCING SOLIDS TO A HUNGRY BABY: Breast (or bottle) feed your baby first. Wait about 30 minutes and then try feeding them the solids. This is good for two reasons – you want to make sure you don’t skip the breast milk feeding (for milk supply and nutrition reasons) and 2 – a happy (i.e. not starving) baby is much more open to trying new things.
4. ALLERGY 3 DAY RULE: When introducing new foods, try only one new food every 3 days. If after 3 days no allergies (skin rashes, crankier than normal baby, or more extreme symptoms) appear, you can safely introduce the next new food. I kept worrying that Parker would get really bored of the same thing over and over, but I quickly had enough items in the repertoire that she could eat to mix things up a bit.

5. OATMEAL IS THE NEW BLACK: If you only choose one cereal to make, go with Oatmeal. Though rice cereal is the most common it actually has the least amount of nutrients and oatmeal will help keep your little one nice and regular (vs. rice cereal which can do the opposite!). Plus - from a flavor perspective it was by far the yummiest!
I look forward to sharing this journey with you, and if you have any topics you want to read about, let me know in the comments. Next time I will be covering shopping in bulk for babies and prepping ahead of time.
XOXO,
Melissa
Printable recipes:
Leave a Reply
Recent Articles
- 8 Ways To Get Organized For Back To School
- 10 homemade baby food recipes you can make in less than 10 minutes
- How to Make Homemade Almond Milk
- Clean Fifteen & Dirty Dozen — Your Guide to Buying Produce
- 10 Unique Baby Shower Gifts


